Difference between revisions of "PBX-BB rev4.1"
From PROBOTIX :: wiki
(→Getting Started) |
(→Getting Started) |
||
| Line 40: | Line 40: | ||
#: Username: linuxcnc | #: Username: linuxcnc | ||
#: Password: linuxcnc | #: Password: linuxcnc | ||
| − | # Launch LCNC by typing 'linuxcnc &' into the shell. Choose the PBX-BB configuration. On future sessions, simply launch LCNC with the PBX-BB config by using the 'last configuration' switch 'linuxcnc -l &'. | + | # Launch LCNC by typing 'linuxcnc &' into the shell. The LCNC software, while running on the BBB, will forward its window onto your PC. Choose the PBX-BB configuration. On future sessions, simply launch LCNC with the PBX-BB config by using the 'last configuration' switch 'linuxcnc -l &'. |
# Use [http://winscp.net/ WinSCP] and [http://notepad-plus-plus.org/ Notepad++] to edit the config files. When you choose 'edit' from WinSCP and allow WinSCP to open the file in Notepadd++, whenever you make a change and save the file, WinSCP will automatically re-upload the changed file to the BBB. | # Use [http://winscp.net/ WinSCP] and [http://notepad-plus-plus.org/ Notepad++] to edit the config files. When you choose 'edit' from WinSCP and allow WinSCP to open the file in Notepadd++, whenever you make a change and save the file, WinSCP will automatically re-upload the changed file to the BBB. | ||
Revision as of 07:51, 9 February 2014
Model: PBX-BB BeagleBone Breakout Board
Breakout Board Specs:
- BeagleBone or BeagleBone Black Compatible
- Screw Terminals or 5x PBX-Headers
- RF Isolated Inouts and Outputs
- 15 Outputs and 5 Inputs
- Integrated 5V/2A Logic Supply Regulator
- USB Powered BeagleBone
Description:
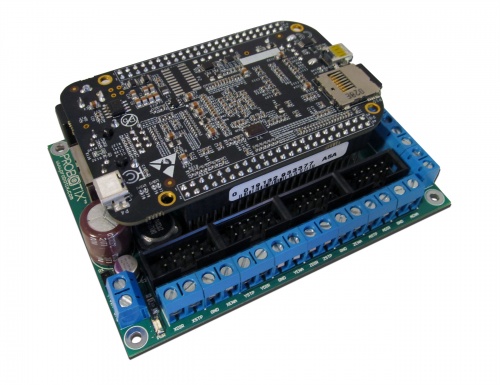
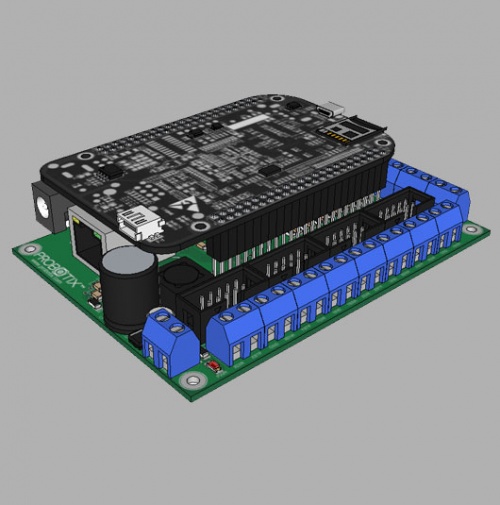
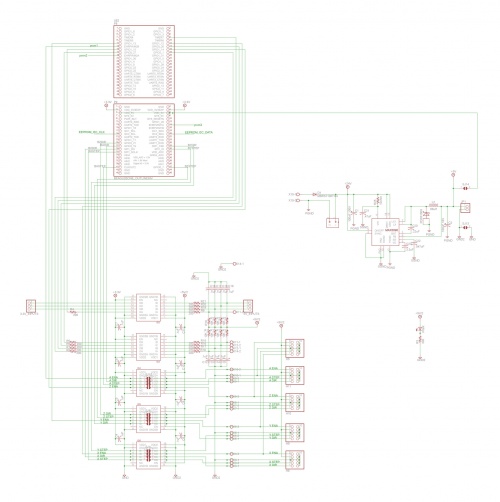
The PBX-BB is the new CNC breakout board for the BeagleBone. It works perfectly with Charles Steinkuehler's Beaglebone port of LinuxCNC. It features 15 total outputs and 5 inputs, all software mappable to whichever signals you need. The PBX-BB features the same RF isolation circuitry found on the popular PBX-RF, protecting the Beaglebones' sensitive 1.8V and 3.3V circuitry from potentially damaging noise and spikes that can come from high voltage stepper motor drives.
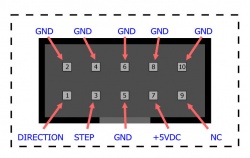
The PBX-BB has 5x PBX-Headers (Figure 1) for easy connections to our stepper drivers and relay boards. Additional signals are present on the screw terminals for driving up to 5 motors and 4 relays.
New on the PBX-BB is a 5V/2A switching regulator that accepts voltages up to 76VDC. The efficiency of a switching regulator reduces heat. The 5V rail is bussed out to the PBX-Headers just like our other breakout boards, allowing you to drive the logic supply of the drivers from a single power source.
Getting Started
- Burn our custom Machinekit Iso Image to an 8GB Sandisk MicroSD Card using Win32DiskImager
- Install the MicroSD card, plug the BBB ethernet connector into your network and apply power. The first time the image boots, it can take up to 5 minutes.
- Use a port scanner such as Advanced IP Scanner to find the ip address of the BBB. (or 'arp -a' from a command prompt)
- Install XMing and Putty.
- Turn on X11 forwarding in Putty and connect to the BBB.
- Username: linuxcnc
- Password: linuxcnc
- Launch LCNC by typing 'linuxcnc &' into the shell. The LCNC software, while running on the BBB, will forward its window onto your PC. Choose the PBX-BB configuration. On future sessions, simply launch LCNC with the PBX-BB config by using the 'last configuration' switch 'linuxcnc -l &'.
- Use WinSCP and Notepad++ to edit the config files. When you choose 'edit' from WinSCP and allow WinSCP to open the file in Notepadd++, whenever you make a change and save the file, WinSCP will automatically re-upload the changed file to the BBB.
Resources:
File:PBX-BB.configs.zip
[MachineKit Image]
BeagleBone
http://bb-lcnc.blogspot.com/2013/07/adding-homelimit-switches.html


