Difference between revisions of "Galaxy Series LinuxCNC Configuration"
From PROBOTIX :: wiki
(Created page with "Copy the probotix.zip file to a freshly formatted USB thumb drive. Insert the thumb drive into the LinuxCNC PC. After a few seconds a window will pop up displaying the content...") |
|||
| Line 2: | Line 2: | ||
[[File:Thumb_drive1.jpg | 500px]] | [[File:Thumb_drive1.jpg | 500px]] | ||
| + | |||
| + | This creates a folder called 'probotix'. Move into the probotix folder by double-clicking it. | ||
| + | |||
| + | [[File:Thumb_drive2.jpg | 500px]] | ||
| + | |||
| + | In this folder you will see a file called 'probotix.sh'. Launch that file by double-clicking it. | ||
| + | |||
| + | [[File:Thumb_drive3.jpg | 500px]] | ||
| + | |||
| + | A dialog will pop up and ask you what you want to do with the file. Chose the "Run in Terminal" option. | ||
| + | |||
| + | [[File:Thumb_drive4.jpg | 500px]] | ||
| + | |||
| + | Follow the onscreen prompts (if any). The passowrd is 'probotix' if it asks for it. | ||
Revision as of 16:36, 19 March 2016
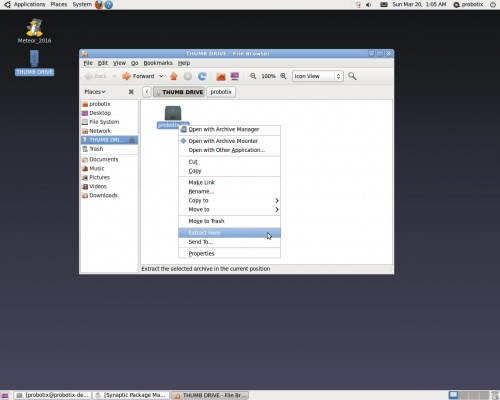
Copy the probotix.zip file to a freshly formatted USB thumb drive. Insert the thumb drive into the LinuxCNC PC. After a few seconds a window will pop up displaying the contents of the thumb drive. Right click on the probootix.zip file and choose the "Extract Here" option.
This creates a folder called 'probotix'. Move into the probotix folder by double-clicking it.
In this folder you will see a file called 'probotix.sh'. Launch that file by double-clicking it.
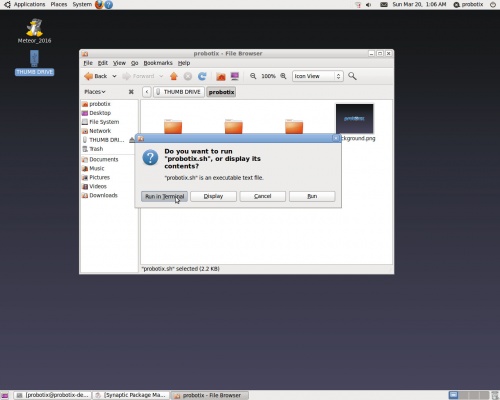
A dialog will pop up and ask you what you want to do with the file. Chose the "Run in Terminal" option.
Follow the onscreen prompts (if any). The passowrd is 'probotix' if it asks for it.


