Difference between revisions of "Galaxy Series LinuxCNC Configuration"
From PROBOTIX :: wiki
(Axis v2.0) |
m (→Getting Started) |
||
| (17 intermediate revisions by the same user not shown) | |||
| Line 1: | Line 1: | ||
| − | + | [[Category:LinuxCNC Configurations|Galaxy Series]] | |
| − | Important: Only run this script when you can afford to have the machine go down temporarily, as you may need to call us if anything goes wrong. We have tested this script several hundred times on as many machines as we could, but as with any software update, results can go not as you planned. If you are concerned, then CALL US TO SCHEDULE A TIME TO DO THE UPGRADE. | + | Welcome to the new Galaxy Series Universal Configurator. This script will reconfigure the LinuxCNC software to add or remove features on your machine and has additional functionality to manage the most common problems in the hopes of maximizing uptime on your machine. Follow the on screen prompts carefully, but do not worry if you make a mistake as you can simply re-run the script to correct any errors. |
| + | <!-- | ||
| + | <div class="errorbox">'''This is not for upgrades/updates.''' Regardless of the amount of time that has passed since the last use of your machine, you do not need to update the software. You should continue to use the software that was packaged with the machine as it was specially configured for that machine when built. In the event that you feel it needs to be changed we suggest you call us first.</div> | ||
| + | |||
| + | <div class="warningbox">'''Important:''' Only run this script when you can afford to have the machine go down temporarily, as you may need to call us if anything goes wrong. We have tested this script several hundred times on as many machines as we could, but as with any software update, results can go not as you planned. If you are concerned, then CALL US TO SCHEDULE A TIME TO DO THE UPGRADE.</div> | ||
| + | --> | ||
| + | Before starting you will need: | ||
| + | * Download the Configurator: [[Media:Probotix.zip | Probotix.zip]] - ''last updated {{RevisionDate| File:Probotix.zip }}'' | ||
| + | * Minimum 8GB USB thumb drive formatted as FAT32 | ||
== Getting Started == | == Getting Started == | ||
| − | # | + | # Copy the <code>Probotix.zip</code> file to the USB thumb drive. |
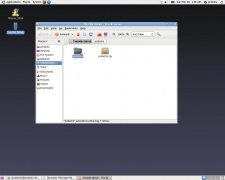
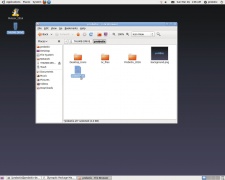
| − | + | # Insert the thumb drive into the LinuxCNC PC. After a few seconds a window will pop up displaying the contents of the thumb drive. Right click on the <code>Probotix.zip</code> file and choose the "Extract Here" option. '''Do NOT copy this to the desktop!''' | |
| − | + | # Double-click on the newly created <code>Probotix</code> folder to open. | |
| − | # Insert the thumb drive into the LinuxCNC PC. After a few seconds a window will pop up displaying the contents of the thumb drive. Right click on the | + | # Find and double-click on the <code>probotix.sh</code> file. |
| − | + | ||
| − | # | + | |
| − | # | + | |
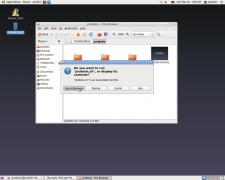
# A dialog will pop up and ask you what you want to do with the file. Chose the "Run in Terminal" option. | # A dialog will pop up and ask you what you want to do with the file. Chose the "Run in Terminal" option. | ||
| − | <gallery mode="packed-overlay | + | <gallery mode="packed-overlay"> |
| − | File: Thumb_drive1.jpg | | + | File: Thumb_drive1.jpg | Extract |
| − | File: Thumb_drive2.jpg | | + | File: Thumb_drive2.jpg | Folder |
| − | File: Thumb_drive3.jpg | | + | File: Thumb_drive3.jpg | probotix.sh |
| − | File: Thumb_drive4.jpg | | + | File: Thumb_drive4.jpg | Run in Terminal |
</gallery> | </gallery> | ||
| − | + | == Screen Prompts == | |
| − | == | + | Type the number of the screen option you wish to select then press ''Enter'' |
| − | + | <gallery mode="packed-overlay"> | |
| − | + | File: config-update.png| Start | |
| − | + | File: order-number.png| Order Number | |
| − | + | File: machine-galaxy.png | Machine Model | |
| − | + | File: uprights.png| Upright Type | |
| − | + | File: zbearings.png| Z Bearings | |
| − | + | File: units.png| Units of Measure | |
| − | : | + | File: spindle.png| Router or Spindle |
| − | + | File: spid.png| Router SuperPID | |
| − | + | File: Drive_nuts.jpg | ACME Types | |
| − | + | File: acme-type.png | ACME Screw | |
| − | : | + | File: driver-type.png| Unipolar or Bipolar |
| − | + | File: jogger.png| Gamepad or MPG | |
| − | + | File: sensors.png| Sensors | |
| − | : | + | File: laser.png| Laser |
| − | + | File: Short_long_mount.jpg | Mount Types | |
| − | + | File: mount-type.png | Mount | |
| − | + | File: rotary.png| 4th Axis Rotary | |
| − | + | File: reboot-yes.png| Requires Reboot | |
| − | + | File: reboot-no.png| No Reboot | |
| − | + | </gallery> | |
| − | : | + | |
| − | : | + | |
| − | + | ||
| − | + | ||
| − | + | ||
| − | : | + | |
| − | + | ||
| − | + | ||
| − | + | ||
| − | + | ||
| − | + | ||
| − | + | ||
| − | + | ||
| − | + | ||
| − | + | ||
| − | + | ||
| − | + | ||
| − | + | ||
| − | + | ||
| − | + | ||
| − | + | ||
| − | : | + | |
| − | : | + | |
| − | + | ||
| − | + | ||
| − | - | + | |
| − | + | ||
| − | + | ||
| − | + | ||
| − | + | ||
| − | + | ||
| − | + | ||
| − | + | ||
| − | + | ||
| − | + | ||
| − | + | ||
| − | + | ||
| − | + | ||
| − | == | + | == Changes made by Configurator == |
| − | * Changes color of terminal window to classic linux shell | + | [[File:Axis_rev1.4.jpg|thumb|Probotix Axis v1.6]] |
| + | * Installs the Galaxy Series version of the [[Probotix Axis Interface]] | ||
| + | * Changes color of terminal window to classic linux shell green on black | ||
* Installs php scripting engine | * Installs php scripting engine | ||
| − | * Installs numlockx to force | + | * Installs numlockx to force numlock key on |
* Installs samba for networking | * Installs samba for networking | ||
| − | * Installs g-code-filter.php to clean up .ngc2 files | + | * Installs g-code-filter.php to clean up .ngc2 files |
| − | * Tries to identify secondary parallel port address, copies lspci output to thumb drive | + | * Tries to identify secondary parallel port address, copies <code>lspci -v</code> output to thumb drive in case you need to email it to us |
* Disables screensaver and idle screen lock | * Disables screensaver and idle screen lock | ||
| − | * | + | * Removes the update manager to prevent non-Probotix updates from installing |
| − | * Turns line numbers | + | * Turns on line numbers and auto-indent in gedit |
* Assigns [q] key to toggle pause/resume - works like feed hold on machining centers | * Assigns [q] key to toggle pause/resume - works like feed hold on machining centers | ||
Latest revision as of 13:28, 26 February 2019
Welcome to the new Galaxy Series Universal Configurator. This script will reconfigure the LinuxCNC software to add or remove features on your machine and has additional functionality to manage the most common problems in the hopes of maximizing uptime on your machine. Follow the on screen prompts carefully, but do not worry if you make a mistake as you can simply re-run the script to correct any errors.
Before starting you will need:
- Download the Configurator: Probotix.zip - last updated 2019-03-26
- Minimum 8GB USB thumb drive formatted as FAT32
Getting Started
- Copy the
Probotix.zipfile to the USB thumb drive. - Insert the thumb drive into the LinuxCNC PC. After a few seconds a window will pop up displaying the contents of the thumb drive. Right click on the
Probotix.zipfile and choose the "Extract Here" option. Do NOT copy this to the desktop! - Double-click on the newly created
Probotixfolder to open. - Find and double-click on the
probotix.shfile. - A dialog will pop up and ask you what you want to do with the file. Chose the "Run in Terminal" option.

Extract
Folder
probotix.sh
Run in Terminal


Screen Prompts
Type the number of the screen option you wish to select then press Enter
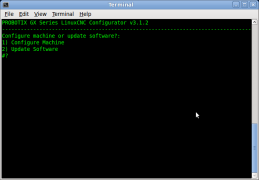
Start
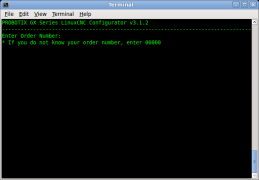
Order Number
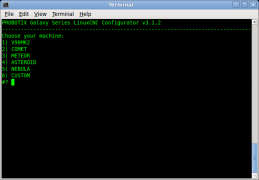
Machine Model
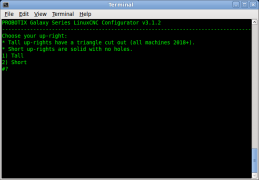
Upright Type
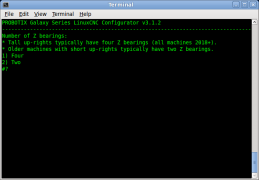
Z Bearings
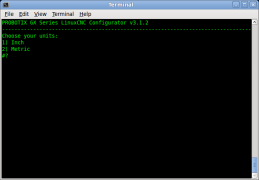
Units of Measure
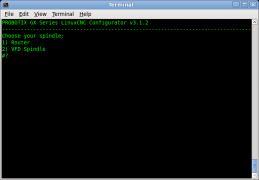
Router or Spindle
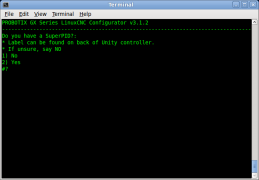
Router SuperPID
ACME Types
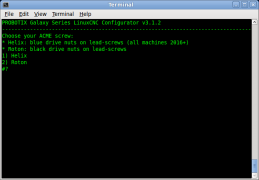
ACME Screw
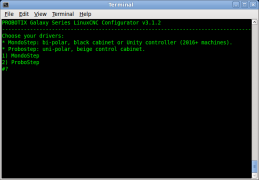
Unipolar or Bipolar
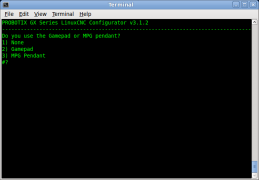
Gamepad or MPG
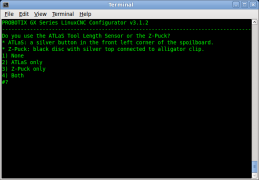
Sensors

Laser
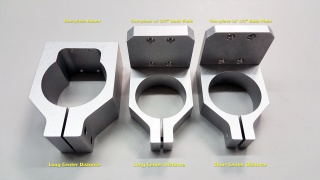
Mount Types
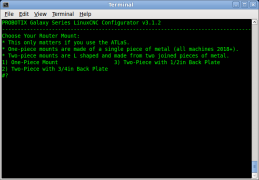
Mount
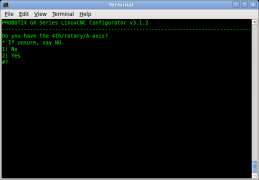
4th Axis Rotary
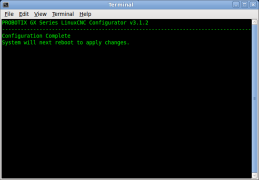
Requires Reboot
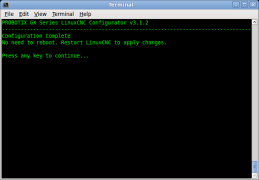
No Reboot


Changes made by Configurator

- Installs the Galaxy Series version of the Probotix Axis Interface
- Changes color of terminal window to classic linux shell green on black
- Installs php scripting engine
- Installs numlockx to force numlock key on
- Installs samba for networking
- Installs g-code-filter.php to clean up .ngc2 files
- Tries to identify secondary parallel port address, copies
lspci -voutput to thumb drive in case you need to email it to us - Disables screensaver and idle screen lock
- Removes the update manager to prevent non-Probotix updates from installing
- Turns on line numbers and auto-indent in gedit
- Assigns [q] key to toggle pause/resume - works like feed hold on machining centers